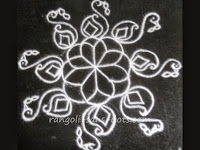
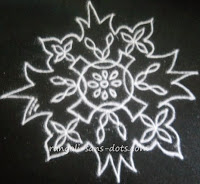
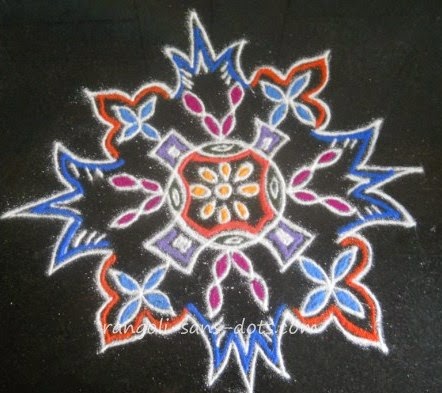
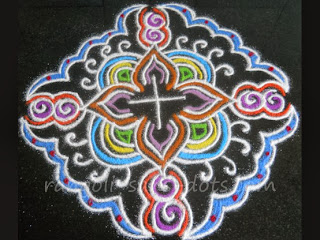
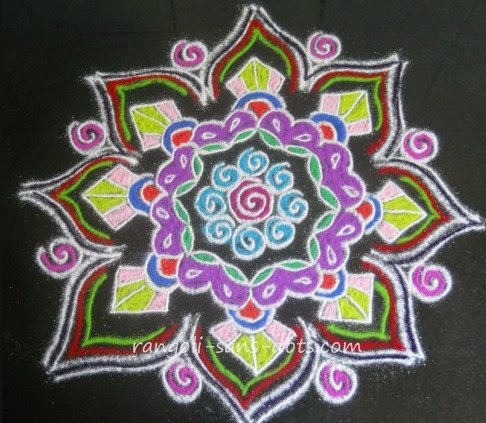
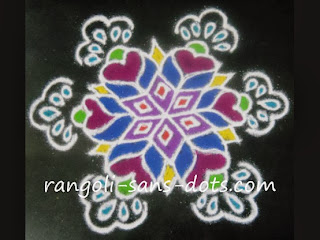
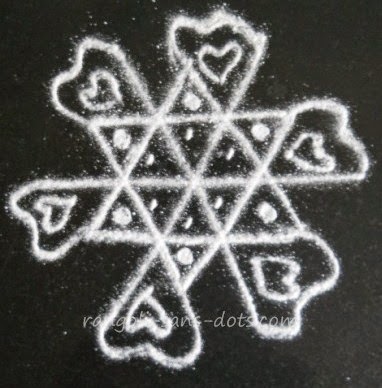
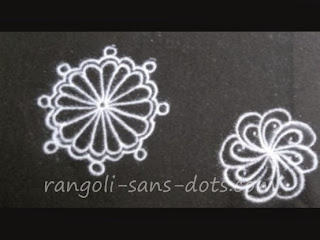
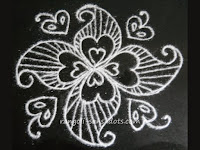
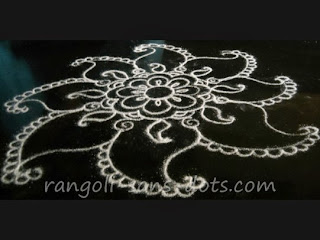
At last I have decided to switch over from blogspot to my (custom) domain. rangolisansdots.blogspot.com is now www.rangoli-sans-dots.com. Though I have drawn all the designs myself personally I am thankful to my family for the inputs, information and help in drafting all the posts so far.
I have used the terms kolam rangoli quite freely in all the posts. Probably there would have been differences based on classical (!) explanations in the past but today kolams can also be colourful like rangolis both in the free hand and dots type. I find that even the terms rangoli kolam and kolam rangoli are used at present. The only area where I think kolam are different are in sikku kolam and arisi maavu kolam. Both are beautiful, challenging and can be intricate . Rangoli is muggulu in Telugu and so this post will be useful for those in search of small and simple muggulu for beginners.This postmay have answers to the following questions
How to draw easy or simple rangoli without dots for our home
(For simple rangoli with dots please go to
5 dots rangoli or 4 dots rangoli designs )
How to make a simple rangoli design at home, how to fill rangoli colours, Rangoli without dots for beginners ?
Rangoli without dots for kids ? This article may have answers to these questions
Some of the posts including this one are with three or four steps so that beginners or children can practise them on-line. An on-line rangoli drawing project ! To add me to your circles to get updates on rangoli kolam and other art and craft please go to my Google plus profile . My Facebook page is Rangoli sans dots
Before attempting to draw a rangoli, also referred to as wave or waving in some schools of thought one needs to practise using rangoli powder to draw straight lines and then curved lines. Initially, there may be problems - like the lines may be very thick, may not be continuous, the flow of rangoli powder cannot be controlled. Hence I have added a video to my Channel on YouTube showing how to draw a line using rangoli powder. It is in slow motion and has been taken in four different angles to give the viewers an idea. Hope it is helpful. Here is the video showing how rangoli flows through the fingers to draw with rangoli (powder). For those not familiar with the use of rangoli a note book and pencil or sketch pen may be useful for drawing rangoli designs.
All designs are simple free hand rangoli designs. Recently I have also added some rangoli designs using dot grid including two rangoli with 7 dot grid ( very simple lamps designs ) . We can practice to draw rangoli with sketch pen or chalk piece till we become comfortable with drawing with rangoli powder (kolam maavu as we say in Tamil ) and we should try because making with rangoli powder is what makes a rangoli pretty, lovely and any other adjective we can think of for beautiful ! Most of them here are small rangoli designs with colours some with dot grid others without . Free hand rangolis start from a central design and proceed radially - outwards however maintaining symmetry in design. Kolams i.e rangoli with dots can be started from the centre or the dots on the outside can be connected first and then the central design can be completed. Finally the remaining dots can be used up. Free hand designs or kolams make use of designs and patterns available in nature. They differ from drawings and paintings in that the details of designs borrowed from nature are simple depictions and do not show intricate details.
The rangoli in the image below is one of the basic designs that can be used for learning.
![easy rangoli design star shape basic-rangoli-making-1.jpg]() Step 1 : Form a star with two inverted triangles. In the second step draw another set of parallel lines to the lines in the star design to get the stage in the top right side of the image. In the third stage floral petals are added around the star design and finally add another set of petals inside the bigger petals. If required add colours as shown or leave it plain and white.
Step 1 : Form a star with two inverted triangles. In the second step draw another set of parallel lines to the lines in the star design to get the stage in the top right side of the image. In the third stage floral petals are added around the star design and finally add another set of petals inside the bigger petals. If required add colours as shown or leave it plain and white.
How to draw easy or simple rangoli without dots for our home
(For simple rangoli with dots please go to
5 dots rangoli or 4 dots rangoli designs )
How to make a simple rangoli design at home, how to fill rangoli colours, Rangoli without dots for beginners ?
Rangoli without dots for kids ? This article may have answers to these questions
Before attempting to draw a rangoli, also referred to as wave or waving in some schools of thought one needs to practise using rangoli powder to draw straight lines and then curved lines. Initially, there may be problems - like the lines may be very thick, may not be continuous, the flow of rangoli powder cannot be controlled. Hence I have added a video to my Channel on YouTube showing how to draw a line using rangoli powder. It is in slow motion and has been taken in four different angles to give the viewers an idea. Hope it is helpful. Here is the video showing how rangoli flows through the fingers to draw with rangoli (powder). For those not familiar with the use of rangoli a note book and pencil or sketch pen may be useful for drawing rangoli designs.
The rangoli in the image below is one of the basic designs that can be used for learning.
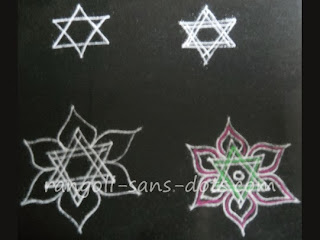 Step 1 : Form a star with two inverted triangles. In the second step draw another set of parallel lines to the lines in the star design to get the stage in the top right side of the image. In the third stage floral petals are added around the star design and finally add another set of petals inside the bigger petals. If required add colours as shown or leave it plain and white.
 Another easy and simple rangoli design using a star shaped pattern at the centre. The rangoli is shown in three steps. The final image below and two intermediate stages or steps in the photos below it.
![nearing completion beginners-rangoli-c.jpg]()
![rangoli at the beginning beginners-rangoli-b.jpg]()
![easy rangoli with star and curved lines basic-rangoli-making-2.jpg]() Rangoli in the image on the left is also a basic star design. Again, draw two inverted triangles but in this case extend the arms from one edge and connect to the other with curved lines as shown. Draw neat and beautiful curved lines makes the rangoli very attractive though it is a very simple rangoli design. Colourful curved lines parallel to the white design can be drawn to complete and get a colourful design. Or leave it plain and simple.
Rangoli in the image on the left is also a basic star design. Again, draw two inverted triangles but in this case extend the arms from one edge and connect to the other with curved lines as shown. Draw neat and beautiful curved lines makes the rangoli very attractive though it is a very simple rangoli design. Colourful curved lines parallel to the white design can be drawn to complete and get a colourful design. Or leave it plain and simple.
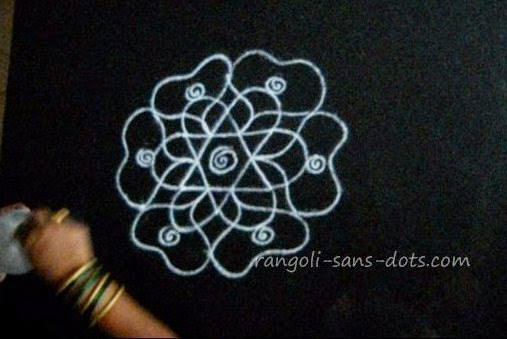 |


 Rangoli in the image on the left is also a basic star design. Again, draw two inverted triangles but in this case extend the arms from one edge and connect to the other with curved lines as shown. Draw neat and beautiful curved lines makes the rangoli very attractive though it is a very simple rangoli design. Colourful curved lines parallel to the white design can be drawn to complete and get a colourful design. Or leave it plain and simple.
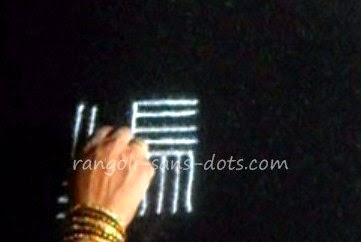
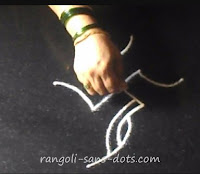
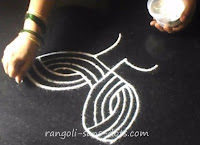
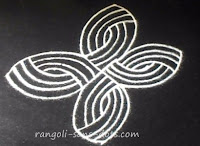
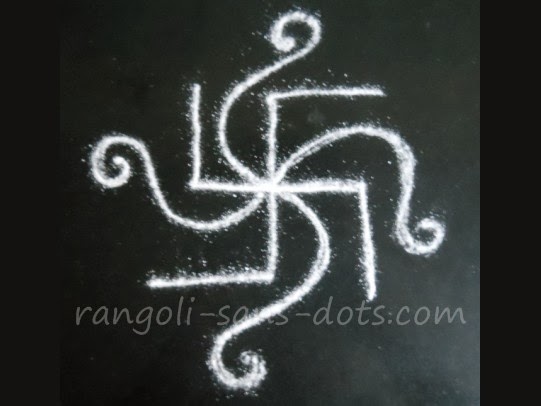
The image on the top shows another easy free hand rangoli for beginners. It is based on swastik that is regularly used in rangoli designs. I hope it is of help to those who want to learn. The trick is only in controlling the flow of rangoli powder between the index finger and thumb in case of rangoli with single line design. Drawing with two parallel lines is little difficult as it involves controlling flow among the index, middle fingers and thumb. The rangoli in four steps shown below is self-explanatory. However the final image can be changed or patterns added or colours added according to our convenience and / or imagination.
How to make a rangoli - with lines
Observe the image above. First draw two sets of parallel lines intersecting as shown in the second part of the image. Add petal like designs and fill with colours as shown to get a simple rangoli design. It is simple, easy to draw. These rangolis can be used as apartment kolams as they are called in Tamil Nadu. Apartment kolam are small rangoli designs drawn at the entrance of apartments due to constraints in space.
. Some designs in here should be suitable for kids too !The image below shows how to draw a floral rangoli design. In the first stage on the top left intersecting lines - four numbers are drawn. From the centre draw curved patterns on either side of a segment of the line to get the floral designs shown in image 2. In the third stage draw v shaped patterns between the petals. Finish the rangoli design as shown in the fourth stage of the image to get a simple floral rangoli design.
The next rangoli a simple design is also a free hand type. The image above shows how the rangoli progresses from two petals to a completed floral design that is further decorated and also filled with colours. shows the final rangoli pattern. After drawing the floral petals at the centre add the longer lines of two different lengths, between the petals to complete the rangoli. It is quite a simple design to teach and to learn!
Now a small rangoli designs with dots and colours
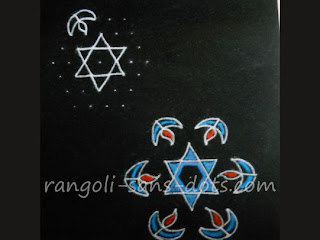
This rangoli on the top is with dot pattern 7 by 4 for drawing lamps designs in rangoli. Lamps ( also called diya or deepam ) are regularly used in rangoli design and so Rangoli-sans-dots is no exception. Place the dot pattern and draw the star shape with two inverted triangles as shown in first part of the image. One lamp has also been drawn with the botttom of the lamp drawn free hand outside the dot grid. The completed rangoli is shown in the second part of the image. The next rangoli is also with dots - 4 by 4 dots grid and the patterns used are quite simple - these type of designs are drawn at the entrances (vaasal padi kolam as it is called in Tamil - literally meaning rangoli drawn at the steps at the entrance.). Incidentally there are some rangoli with 4 dots in Rangoli-sans-dots the link is given at the bottom of this post.
Another rangoli with 7 dots also using lamp designs in the images below. This design has already been shared in rangoli-sans-dots. Now the white rangoli with steps have been added here because it is a very simple and easy design and hence is relevant here. Place the dot pattern, draw the lamps as shown in the first image, connect the lamps with curved lines as shown in the second image.
White rangoli is actually a misnomer. However practically speaking, particularly in parts of India where the practice of drawing rangoli art daily in the morning ( and in some cases in the evening) plain or white rangoli designs are used. Hence this collection of this type of rangoli designs are also shown.
Now a small rangoli designs with dots and colours
How to make a rangoli - lamp or diya designs for Diwali
Another rangoli with 7 dots also using lamp designs in the images below. This design has already been shared in rangoli-sans-dots. Now the white rangoli with steps have been added here because it is a very simple and easy design and hence is relevant here. Place the dot pattern, draw the lamps as shown in the first image, connect the lamps with curved lines as shown in the second image.
White rangoli is actually a misnomer. However practically speaking, particularly in parts of India where the practice of drawing rangoli art daily in the morning ( and in some cases in the evening) plain or white rangoli designs are used. Hence this collection of this type of rangoli designs are also shown.
How to make rangoli - simple floral patterns without a dot grid with colours
Another rangoli in this series of simple rangoli for beginners, in a few steps. The floral petals are drawn and the rangoli developed around it to get the final image shown at the bottom right.
The next rangoli is also a very easy rangoli design in line with the title of this post. The rangoli is shown through 4 steps. In the third stage the petal like patterns are joined as shown. The final image with curlicues and colours make a simple pattern very beautiful.
The images above show how to draw plain or white designs with the final image shows the colours filled. Filling up rangoli with colours of our choice or suitable to the motifs or patterns used. Filling rangoli with rangoli powder also comes with practice because care should be taken to ensure that the colour of one pattern or design does not spill into the other. However, if it happens, it can be corrected. For example if we fill a rose with pink colour and we inadvertently spill green meant for the leaves, on the pink petals, that can be corrected by adding pink again over the spilt green colour.
A collection of videos 30 plus rangoli designs without dots that are simple is available in my YouTube channel Rangolisansdots Some simple free hand rangoli designs without steps
This rangoli is also with a circle as a theme with petals inside radiating from the centre. I have added triangular patterns around the circle. Though it is quite simple till this stage, filling up the colours inside needs a lot of patience. You may observe that I have used two shades of pink for the petals inside.
Another version of rangoli with lines that can be part of a bigger rangoli - this rangoli can be considered as one element and many of them joined to produce a big rangoli for festival seasons. The images below show the steps to draw this rangoli.
![free hand rangoli designs rangoli-desing-simple-5jpg]() The rangoli on the left (with blue and brown petals) is another of the many floral designs I have tried in Rangoli-sans-dots The flower at the centre has been surrounded by one more flower. The edges of the petals of the outer flower and in between them some simple patterns have been drawn. Then colourful lines are drawn inside the rangoli to get the image as seen below. In both designs the gaps can be filled with colour rangoli powder. It will be more suited to the design above. The floral pattern below looks nice even without this enhancement. Hence probably it is better to leave it as it is. Two intermediate steps for this simple rangoli in the pictures below for reference though the image in colour is itself self explanatory.
The rangoli on the left (with blue and brown petals) is another of the many floral designs I have tried in Rangoli-sans-dots The flower at the centre has been surrounded by one more flower. The edges of the petals of the outer flower and in between them some simple patterns have been drawn. Then colourful lines are drawn inside the rangoli to get the image as seen below. In both designs the gaps can be filled with colour rangoli powder. It will be more suited to the design above. The floral pattern below looks nice even without this enhancement. Hence probably it is better to leave it as it is. Two intermediate steps for this simple rangoli in the pictures below for reference though the image in colour is itself self explanatory.
The next stop for small rangoli / kolam designs
Make rangoli in 2,3,4 steps !
For craft ideas
Some of themes in Rangoli sans dots include the lotus , butterflies and birds that can be practised after going through the easy rangoli designs
A basic and simple freehand kolam from with lotus and birds
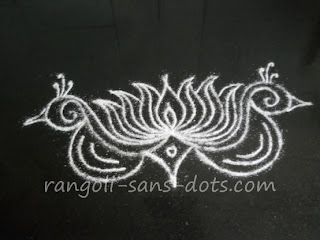
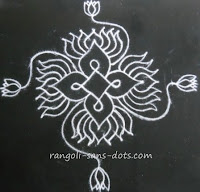
The kolam (above ), a free hand kolam with lotus patterns with birds on either side. If you watch closely, it appears as if the birds wings have merged to form the lotus petals ( If any optical illusion is there it is not intended and only accidental ). A lotus bird combination . A colourful design is possible -. Pink colour for the petals, green for the stalk and orange for the birds, just a few lines can be added to get a colourful kolam.
he kolam below can be considered to be a floral design with many layers of petals of various shapes. Again add colourful lines parallel to the white design to get this simple but beautiful rangoli. A white version of this rangoli has been uploaded in colouring page - rangoli. Comparing both will give us an idea how colours can influence the attractiveness of a rangoli design.
![first step of the rangoli simple-free-hand-rangoli2410a.jpg]()
A basic and simple freehand kolam from common star rangoli
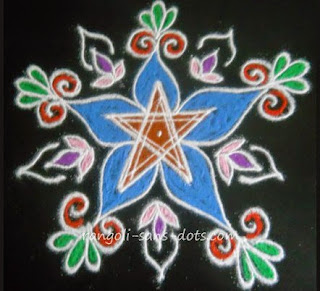
The next rangoli is also a floral design. The star shaped design is drawn to get two lines. Petals are drawn along the edges of the star and edges of the petals have some floral designs. The gaps between are filled with floral petals and the rangoli is filled with blue pink and green colours to get the design shown below. A simple but attractive rangoli. Can be drawn in double quick time.
Two simple freehand kolam with colourful lines
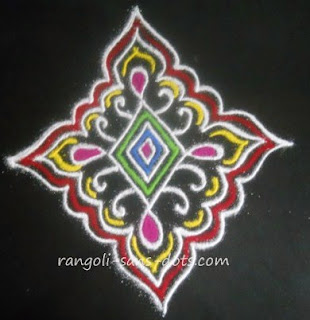
The rangoli above has rhombus like design at the centre. All the four sides and four edges of the design are added with simple free hand designs and the entire rangoli has a simple single line border at the periphery. Add another line red- colour-continuous and parallel to the border. Add yellow lines, broken at various places as shown in the image below. A series of smaller rhombuses of various colours are added at the centre. The result is the simple pattern shown above
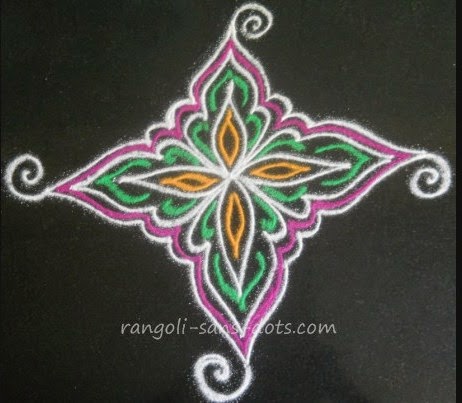
The rangoli is a simple pattern with four leaves at right angles. Each leaf is decorated with simple designs The rangoli is then decorated with a line border along the periphery. The gap is then filled with pink rangoli powder to make it more attractive. Also orange and pink (bright colours are added ) to enhance the beauty of a very easy design. Such simple designs can be drawn for Navaratri or Diwali. Also for those who want to try some simple designs for Margazhi. They are simple but nice.
A simple freehand rangoli using lines
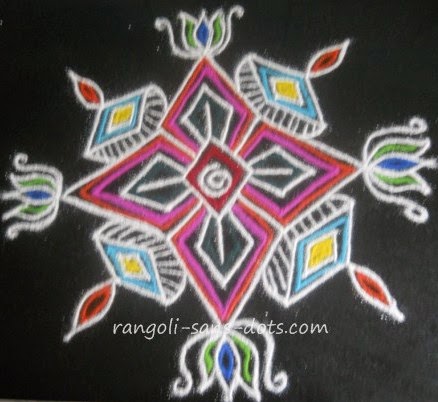
The next kolam, a simple design in this series - a line kolam design drawn without dots. Draw four parallel lines and four more lines perpendicular to them ( just as we do in tic tac toe ! ) . Develop the kolam with lamps on four sides and handles. Add some colours. The result is the simple design below.
Another rangoli or kolam yet another simple design using some paisley motifs and mango leaves.. It is a very basic kolam design and is a simple line rangoli formed by a pair of parallel lines intersecting each other . Around the lines the leaf-like patterns have been added. The ones in green with mid-rib and veins are the mango leafs and the ones in yellow are mango motifs ( paisley ) . Mango leaves are considered to be auspicious in India and it is quite common to see festoons ( called toran ) made from from mango leaves tied to a string hung outside the house for festivals and special occasions like house-warming, baby showers , wedding,
Simple rangoli design for Diwali
.
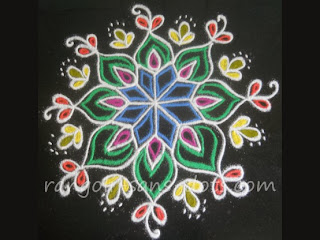
The free hand rangoli above has a central floral design with eight petals. This design is surrounded by a simple rangoli border. Arms are extended with circular patterns on eight sides. (Probably it looks like a star fish! but a star fish has fewer arms ). The border is complemented with a green line border running parallel to it. The gaps between the border and the central flower is filled with the designs in yellow. The flower I also decorated with alternate blue and red colours for the petals. Mid-ribs are also drawn on the flower petals. The end result a simple but colourful free hand rangoli if you are looking for a quick and simple rangoli design for Diwali.
The rangoli design above is a complete flower design with no other motif or pattern added. The central floral pattern is drawn with as many petals as possible. From these more and more petals are drawn to get the design as shown in the image above. However, I have added pink colour at the centre surrounded by petals in blue, green and red. We need some liberty both in drawing and applying colours so that we can give our imagination (?) a free hand (!) to get a free hand muggu design of our choice. This floral beauty was originally in the category muggulu ( muggulu is rangoli in Telugu / Andhra ) since there were too may designs there and I thought that I should show some completed simple colourful rangoli designs that can be drawn for Diwali or Navratri for those who want to celebrate the festivals with simple designs I shifted this here.
Another simple colourful rangoli for Diwali
The rangoli design above is a complete flower design with no other motif or pattern added. The central floral pattern is drawn with as many petals as possible. From these more and more petals are drawn to get the design as shown in the image above. However, I have added pink colour at the centre surrounded by petals in blue, green and red. We need some liberty both in drawing and applying colours so that we can give our imagination (?) a free hand (!) to get a free hand muggu design of our choice. This floral beauty was originally in the category muggulu ( muggulu is rangoli in Telugu / Andhra ) since there were too may designs there and I thought that I should show some completed simple colourful rangoli designs that can be drawn for Diwali or Navratri for those who want to celebrate the festivals with simple designs I shifted this here.
The rangoli above is a floral design rangoli with a flower pattern at the centre with flowers and a few petals on the top of each petal. The whole arrangement is surrounded by a simple parallel line border that is decorated with two parallel red lines. Colours are added to the flowers on the outside and the inside. The area at the centre that is vacant is filled with a simple pattern with alternate red and white lines. Fill up colours to make it more attractive, the remaining gaps can also be filled.
The lotus, is widely used in freehand rangolis. No wonder I have also used them in Rangoli-sans-dots at the centre of a rangoli,or on the periphery. The lotus has been a religious symbol in India and one can find them in religious places like temples. The lotus in particular has been associated with many Gods and Puranic tales.Above, two rangolis for this festival season. The first rangoli has a pink floral base with four petals. I have added colourful motifs above each petal. Some freehand designs have been added between the petals. Complete the rangoli with bright colours. The motifs chosen should match the floral design at the centre.
The rangoli starts with a plus and expands with semi-circular patterns and petal like designs. It has a simple two line border filed with blue rangoli powder on which red dots are added. All the four edges have spiral patterns. The rangoli is filled with different colours yellow, green and blue. The remaining space that is black can also be filled with some colour of our choice, only thing it is to be done carefully. The rangoli with colours filled is available in Dusshera rangoli
The first kolam is floral design with with pink and blue flowers decorated with a white and green border. This floral motif is regularly used in rangolis. It has a central design formed with overlapping basic patterns as shown. From eight of the edges so formed leaving the remaining eight due to lack of space, eight flowers with four petals each are formed. The kolam is then covered with a single line border. The flowers are filled with blue and pink colours alternately. The kolam border has one more green colour line added parallel to the original border.
The lotus, is widely used in freehand rangolis. No wonder I have also used them in Rangoli-sans-dots at the centre of a rangoli,or on the periphery. The lotus has been a religious symbol in India and one can find them in religious places like temples. The lotus in particular has been associated with many Gods and Puranic tales.Above, two rangolis for this festival season. The first rangoli has a pink floral base with four petals. I have added colourful motifs above each petal. Some freehand designs have been added between the petals. Complete the rangoli with bright colours. The motifs chosen should match the floral design at the centre.
The kolam design in this series in the image above. Draw the rhombus at the centre and on the edges expand it further. Draw a flower design and diyas between them. Fill with various colours - pink, blue, yellow and of course red or orange for the flame - to get the final design. A collection of simple, cute and beautiful (!) rangoli designs. Including those in the videos and excluding those in the links there are plenty of rangoli designs here. We can choose nine from these and use one for each day of Navratri to make the celebration more attractive and grander or for that matter have a simple colourful rangoli for Diwali.
This rangoli design on the right, simple , for Navaratri has a central floral design with four petals the design is expanded along the petals with simple motifs on all four sides. After the basic design is finished with white rangoli powder, colours are added with colour rangoli powder to form four orange and four pink petals as shown. The remaining areas are filled with blue colour to have a light blue back ground. The next rangoli, on the left has eight patterns from curlicues at the centre The design is then enhanced as shown in the image. Finally colours are filled. Then with white rangoli powder the inner side of the curlicues are further decorated. As with many rangoli in Rangolisansdots even when simple two stages are shown in the white rangoli stage.
The next rangoli is another floral design. The central floral design is drawn with eight petals as above. Only the shapes of the petals are different. Above each petal a bird (let me call it a duck) designs are drawn one for each petal. That is the beauty of a rangoli. Depicting a bird is simple. All intricate details that are required in drawing or painting or not required here. A simple free hand design to represent a bird will suffice. To further improve the rangoli the birds are shown carrying fruits. Fill the rangoli with colours as shown in the image. It is not necessary to fill the entire rangoli in these types of rangoli. It will suffice if we draw colourful lines inside the rangoli design. A floral design with birds is ready for use. One of the easiest and best ways to make birds patterns !
However, traditionally, in parts of India, rangoli are drawn at the entrance daily and are filled with colours rangoli powder of various colours or left plain and white as in the image on the left.. Filling of rangoli with various colours is an art and needs some practice so that one colour does not spill on to another. So this design can be used for filling colours with sketch pen or pencils. If one has the patience, the rangoli can be drawn and the colours filled. Usually, for drawing a rangoli and filling it with colours and completing the design one will need between 15 minutes and one hour depending upon the design, the method of colouring chosen.
These rangoli / kolam desings may be useful for those who want small and simple designs for Diwali, Margazhi or Navratri
This rangoli design on the right, simple , for Navaratri has a central floral design with four petals the design is expanded along the petals with simple motifs on all four sides. After the basic design is finished with white rangoli powder, colours are added with colour rangoli powder to form four orange and four pink petals as shown. The remaining areas are filled with blue colour to have a light blue back ground. The next rangoli, on the left has eight patterns from curlicues at the centre The design is then enhanced as shown in the image. Finally colours are filled. Then with white rangoli powder the inner side of the curlicues are further decorated. As with many rangoli in Rangolisansdots even when simple two stages are shown in the white rangoli stage.
Simple bird rangoli design without dots
The next rangoli is another floral design. The central floral design is drawn with eight petals as above. Only the shapes of the petals are different. Above each petal a bird (let me call it a duck) designs are drawn one for each petal. That is the beauty of a rangoli. Depicting a bird is simple. All intricate details that are required in drawing or painting or not required here. A simple free hand design to represent a bird will suffice. To further improve the rangoli the birds are shown carrying fruits. Fill the rangoli with colours as shown in the image. It is not necessary to fill the entire rangoli in these types of rangoli. It will suffice if we draw colourful lines inside the rangoli design. A floral design with birds is ready for use. One of the easiest and best ways to make birds patterns !
However, traditionally, in parts of India, rangoli are drawn at the entrance daily and are filled with colours rangoli powder of various colours or left plain and white as in the image on the left.. Filling of rangoli with various colours is an art and needs some practice so that one colour does not spill on to another. So this design can be used for filling colours with sketch pen or pencils. If one has the patience, the rangoli can be drawn and the colours filled. Usually, for drawing a rangoli and filling it with colours and completing the design one will need between 15 minutes and one hour depending upon the design, the method of colouring chosen.
These rangoli / kolam desings may be useful for those who want small and simple designs for Diwali, Margazhi or Navratri
Simple rangoli / muggu / kolam for practising and learning
Frankly,contemporary rangoli has many names, kolam , Rangavalli, muggulu in southern India. Though the names are different, what is common among them is that they are all beautiful and that is what matters most. All the designs are a tribute to those who draw them daily and for festivals. Muggulu designs are associated
with Sankranthi festival in Andhra Pradesh, rangoli designs with Diwali in many parts of India and kolam is
associated with Margazhi season in Tamil Nadu so far as festivals are concerned.
Rangoli is called kolam in Tamil , muggu or rangavalli in Telugu . Some more simple designs from my collection for practising.
The rangoli / muggu above has a central circular design. Four simple geometric patterns evolve from the circle. Above these flower designs with four petals each are drawn. Also a petal or leaf design is drawn between any two flowers. It is is completed with a border surrounding all these. On the inside of the border blue and orange lines are drawn parallel to the white line. The circle at the centre has a 8 petal design at the centre. I have not filled the gaps and treated it as completed at the level shown in the image above.
Instead of filling up the inside with colours as is usually done, I have drawn parallel lines with different colours hence the time taken to complete is relatively less.
Instead of filling up the inside with colours as is usually done, I have drawn parallel lines with different colours hence the time taken to complete is relatively less.
The motifs or patterns surrounding the centre were thought of as the muggu / rangoli developed. This is usually the case in any free hand design. We have some idea and the design develops as we draw the rangoli. Then it is filled with some colours on the periphery to save time and and also to give a different appearance to the image.
![muggulu simple design with floral patterns muggu-design-3011-a.jpg]()
The kolam / muggu on the topt is another of the series of muggulu designs drawn for the season. The basic design at the centre is a four petal flower. Above each petal few more petals are added. The rangoli is surrounded by a simple border in white. Fill the petals with different colours the leaves green. One more single line border in blue is added along the white border to increase the beauty. Finally some spirals and lines are added inside the rangoli. Instead of this the entire design can be filled with rangoli also. These designs also can be drawn for Diwali and Navratri.
The rangoli starts with a plus and expands with semi-circular patterns and petal like designs. It has a simple two line border filed with blue rangoli powder on which red dots are added. All the four edges have spiral patterns. The rangoli is filled with different colours yellow, green and blue. The remaining space that is black can also be filled with some colour of our choice, only thing it is to be done carefully. The rangoli with colours filled is available in Dusshera rangoli
This kolam / rangoli below also uses floral petals as motifs. The basic kolam is drawn with sprail patterns as shown. The outermost patterns are based on floral petals and are used to decorate the kolam.
At the centre a spiral design surrounded by more spiral designs to form a small circle is drawn. Around the
circle surrounded by or decorated by patterns according to one's imagination. The design next is drawn in two stages first the outline is drawn and then the bottom lines are added to get the pattern in light blue. This is surrounded by a simple border in purple. The rangoli is now decorated with the patterns in pink and green. Few white patterns are added in the area filled with purple rangoli . Then petal patterns in red and green are added to get the final image.
This rangoli can further be made attractive by adding more patterns with colour or white rangoli as shown in the image above. .
Flower kolam without dots for Margazhi and Pongal
Finally the flowers and the centre are decorated with white rangoli to get this free hand kolam. If you observe closely, the design formed is flowers inside a flower. A very different free hand kolam.
Flower rangoli design -
As usual draw the floral design at the centre first. along each petal draw another flower. I have drawn six flowers for eight petals because I though drawing eight flowers may cramp the rangoli for space. Also I cannot draw any other motif. Of course we can try with eight petals also. After the seven flowers are drawn ( one at the centre and the six around it ) fill the remaining gaps with designs of your choice. I have chosen leaves (one pair and two pairs ) so that it is congruous with the basic floral design. Now add colours to the flowers. I have chosen pink, blue and red and of course green for leaves. Minimise the number of leaves so that rangoli is attractive. The remaining gaps also can be filled with some colours. I have stopped at this stage due to lack of time today. If required draw mid-ribs in the to get the final design. Also add some straight lines on the border to enhance the effect of the rangoli.We can also have colourful easy free hand kolam or rangoli for the golu or kolu for Navratri
These designs are beautiful but can be drawn quick and easy too.
The rangoli / muggu design above is one with floral petals all around. The central pink petals are surrounded by green designs and the outer most border has three petals on the top of each petal below. One of my favourite designs.
The rangoli / muggu below has a geometric shape at the centre with six rhombuses formed by drawing intersect lines and joining them. From these floral patterns with many petals are drawn to get a beautiful floral muggu. On the top of the flower motifs with petals or leaves are drawn surrounded by a simple muggu border. Now colours are added to the flower design. On the outer side the designs are filled with green colour. So they are leaves and not petals in this case. Finally the central design is further enhanced as shown above. I also had a different colouring method ( not scheme) in my mind.Such simple kolam designs as shown below can also drawn for the golu or kolu for NavratriThe kolam design on the top is a symmetrical design with suitable patterns. The floral pattern at the centre with four petals is drawn. Around this eight designs are drawn as shown in the image above. On the periphery simple curved lines are added to enhance the attraction. The rangoli is filled with colour powder of different hues. The remaining gaps are also filled. Finally more simple patterns are added inside in white.
Simple kolam jewellery designs
Whether jewellery is an inspiration for kolam or kolam is an inspiration for kolam both forms of art are mutually benefited. I share some of the plain and white versions of free hand rangoli ( or kolam ) designs that I have drawn. These designs were created from the ideas I got from jewellery. ( It is not only nature from which we draw inspiration, we can also get creative ideas from objects created by us ). From the images it is obvious that the designs are from ear rings ( thodu in Tamil ). I share a few designs from the simple to one that is some what intricate.
The first two are the simplest and we can find many ear rings and lockets using this design. The second one is a common ear ring / locket found in gold jewellery shops
he kolam below can be considered to be a floral design with many layers of petals of various shapes. Again add colourful lines parallel to the white design to get this simple but beautiful rangoli. A white version of this rangoli has been uploaded in colouring page - rangoli. Comparing both will give us an idea how colours can influence the attractiveness of a rangoli design.
A kolam without dots inspired by jewellery ( ear ring or thodu in Tamil !)
The images in black and white show two intermediate steps for the rangoli. The image on the left in white as an activity for colouring activities.

For a change, one simple kolam with some colours. Draw the central flower design. Draw the flowers on four sides, add the floral buds between these flowers and connect the flowers and buds with stalks. Finally fill with colours to obtain the image above. Though this is a simple rangoli, it can also be used as a central design of a larger kolam. This is a free hand kolam and steps are quite simple
Simple kolam, easy kolam call them by any name the idea is to have some kolam that are easy to draw due to one of the following reasons, constraints in space either at the entrance or the puja room, to have an idea of simple designs to learn or to practice kolam art. So some designs that are small, easy and simple are there in Rangoli sans dots. These kolam designs can also be used as simple apartment kolam designs as they are called in Tamil Nadu.
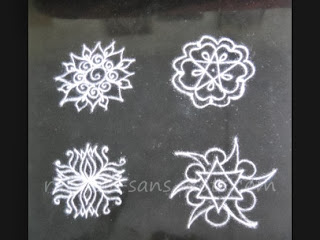
In the image above all are free hand kolam. The first one has a spiral design at the centre surrounded by spiral patterns and finally decorated with floral petals on and in between the spiral designs. The second kolam has a star drawn at the centre that is decorated with a petal at the junction of any two lines. Finally a floral petal or curved line border drawn with two parallel lines drawn separately to get the final image.
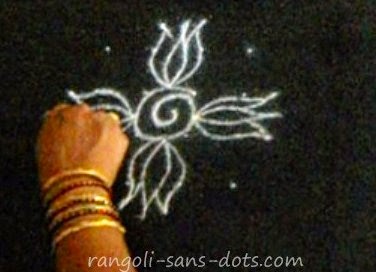
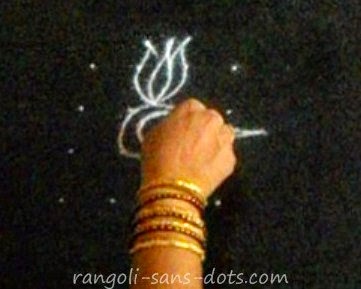
The lotus design can be drawn free hand or with dots. Two steps showing how to draw this simple kolam design
The third is one of the many lotus kolam design that I have drawn here. It has four petals at right angles and each petal grows into a lotus with petals added on either side to get this kolam.
The fourth one is again a star design at the centre. Circular pattens are drawn at the edges and any two circular designs are connected with curved line patterns as shown.
All the above kolam designs are quite simple and can be drawn in double quick time. For learners it is a useful photo of four simple and easy kolams for learning.
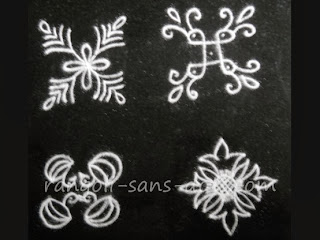
Small kolam , rangoli
The second set of basic and easy kolam designs in the photo above. All have been drawn free hand. The first kolam in the first row has a floral petal design with four simple floral designs on the four corners. Aren't they cute and beautiful.
The second kolam in the first row has deepam like designs around a basic design at the centre. It can be drawn with 7 by 1 dot pattern also and is in 7 dot kolams. The first kolam in the second row has lotus patterns. The second kolam is a simple floral pattern.The third kolam in the second row can also be drawn with five by five dot pattern.. Since these are basic designs I have drawn only the white kolam patterns. Colours can be added. These designs may be helpful for practising. For knowing the steps for basic and advanced designs please visit my YouTube channel Rangolisansdots.
Small rangoli , kolam
.
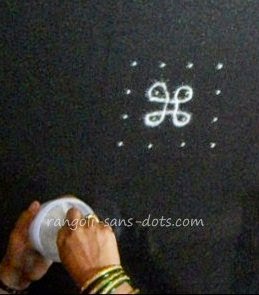
Another set of kolam ideas that are easy and basic designs that may be useful as very simple kolams. All of them have been drawn free hand but can be drawn with dot grids like 4 by 4 dots. The first and second kolams in the first row are very simple designs as it is obvious from the image. The first kolam in the second row has simple bird like shapes and the second one is a purely free hand design. Information on the steps involved in drawing these designs is available for some of these kolams
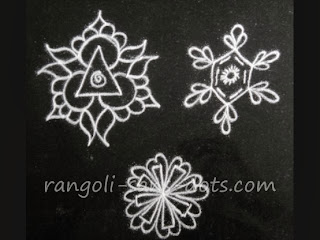
In the photo above, the next in this series on small and easy kolam for learning, three designs have been drawn all free hand versions. The first one has been expanded from a simple triangle, the second one from a hexagon!. The third one from a number of intersecting lines. All the three have been completed with some petal like patterns. The lines inside the hexagon parallel to the sides resemble lines in benzene!. Of course six lines are not there in a benzene ring ( I hope I am correct ).
This image shows an intermediate step for the kolam on the top left
These two steps are for the kolam design at the top right - two steps are shown in the photos below -
Both can be drawn free hand or with a dot grid of 4 by 4
A design with couple of parallel lines intersecting each other that grows into a simple but attractive rangoli with leaves and flowers is shown in the photo below in two stages. The final rangoli after adding colours is in the second stage.
Simple Butterfly rangoli without dots
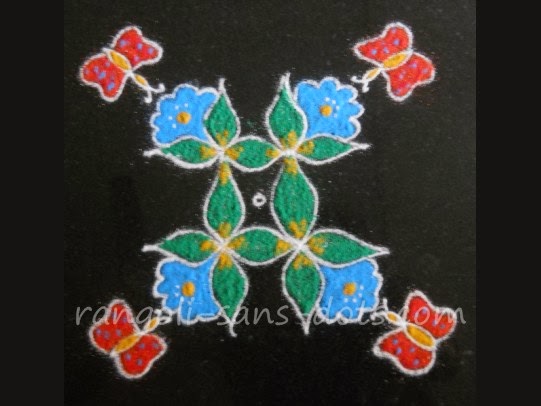
The next rangoli is an improvement of the previous rangoli with four butterfly patterns added in the image above Again a free hand version with a flower with four petals at the centre. The white dots in green representing the centre of the flower. Due to the nature of the rangoli design with long petals I have drawn slim butterflies with elongated bodies. However filling the colours has ensured that the resulting design is beautiful. This rangoli on the left is again on this theme - butterfly and is actually an improved version of a rangoli drawn with leaves and flowers in one of the earlier posts. Here I have added some elements of nature, leaves, flowers and butterflies to get a simple but cute and beautiful rangoli design, drawn free hand of course. Two steps for this simple pattampoochi kolam ( vannathu poochi and seethakoka chiluka) as it is called in Tamil and Telugu or simply butterfly kolam or butterfly muggulu !
The kolam, a butterfly rangoli design without dots. It is combination of butterflies, flowers and leaves. First draw the star shape with two inverted triangles. Between any two sides draw the butterfly designs in blue and yellow ( I am not aware of such a butterfly in nature but give some allowance for my imagination!). Between two butterflies draw the flowers and leaf patterns and add suitable colours to complete the design. A simple rangoli with nature as theme (butterflies, flowers and leaves are congruous and hence suitable for a theme ) for competitions or for festivals. Of course it can be developed further from here. if there are no constraints. This also suitable for Margazhi season when we see many colourful and beautiful kolam designs. This rangoli will become simple without the leaf patterns.
Rangoli sans dots literally means Rangoli without dots However Rangoli-sans-dots will have designs without dots, with dots and a few arts and crafts ideas I will also try some designs that can be drawn with a dot pattern and the same designs free hand. This image above is a free hand rangoli with three butterflies around a flower. So far as rangoli designs are concerned I think it not necessary to have the complete pattern and hence some tendrils around the flower to show that it is a creeper. I have drawn a bigger butterfly with two smaller ones on either side. This design cannot be drawn with dots (exact replica ) because of the lack of symmetry.
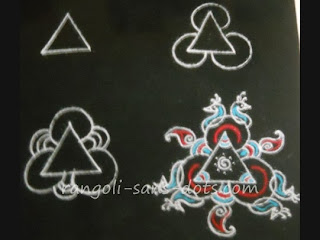
The next rangoli, in theme on nature and again with some bird patterns in the image below. Start with a basic geometric pattern like triangle and the rangoli grows upto stage three. Upto this stage it is quite easy. In step 4 of the image some paisley motifs and bird patterns are added. We can have a single bird design also for each edge of the triangle. I have added two birds that are look away from one another. I have added the crown also for each bird. The tail of the birds have not been added to make the design somewhat simple. We can add colourful tails also to make the rangoli even more attractive. Simple colouring scheme and method has been followed in this rangoli. Adding colours can be left to one's imagination.
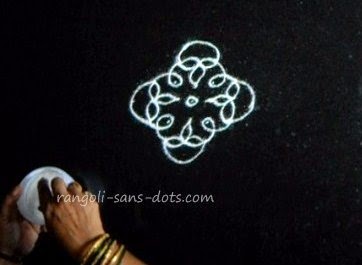
One more set of rangoli designs, small ones have been added through the photo given below. Both are small and cute rangoli designs, both basically circular in design, the first one is and can be used as the central pattern for many a bigger design. Draw a number of intersecting lines to form a chakra like pattern. Connect them with curved lines and draw a curved line border around this rangoli to get this small rangoli. The second has intersecting curved lines - two sets one above the other all connected to get this small rangoli. Again this can also be used as a part of a larger rangoli.
The rangoli below is called krishnan dindu (Krishna's arm rest or bolster is a rough translation ) For this design also I have used a quadra-line design. Follow the same procedure used for the previous rangoli. Instead of petals draw curved lines to connect all the straight lines to get the final design that looks like an endless loop. Fill the design completely with colours of your choice. When completed one cannot see where the rangoli starts and where it ends. These rangolis are very simple and very easy to draw. Two stages of this kolam or rangoli are shown below. Drawing parallel lines close to each other is the requirement. ( Of course with rangoli (powder ) and without any aids we can do it as is humanly possible ). Such thin lines are drawn in ezhai kolam - a unique design that has a rangoli or kolam design with patterns formed using many lines. Ezhai means a single strand of the many strands in a thread or string. So the lines should be as thin as possible. This kolam below may be considered as a basic and simple ezhai kolam.
Another version of rangoli with lines that can be part of a bigger rangoli - this rangoli can be considered as one element and many of them joined to produce a big rangoli for festival seasons. The images below show the steps to draw this rangoli.
Drawing floral patterns in kolam
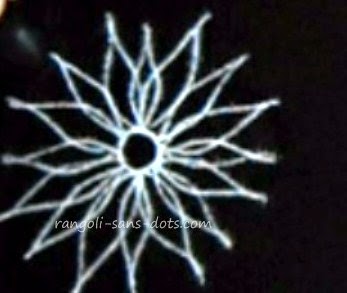
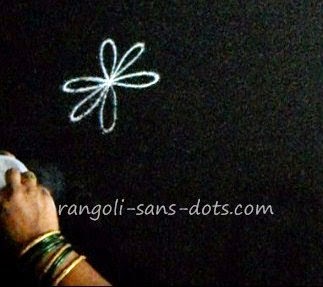
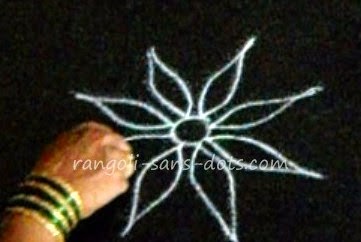
It is possible to draw floral patterns with four, eight, sixteen and thirty two petals. More the petals denser the petals appear. Of course, more than thirty two may make the design congested. The three images below demonstrate how a flower blooms ( ! ) in a rangoli with eight and sixteen petals finally. Draw a small circle and around the circle draw four petals at right angles to each other. Add four more petals in the gaps to get eight. Now add petals between any two of the eight petals drawn earlier to get sixteen petals.Four basic flower rangoli patterns that I invariable use in addition to the ones shown above. The first one the petals are shown independent of the centre of the flower. The second one is also similar to the first the difference being in the first case the edge of petal is rounded while in the second case the edges and the bottom of the petals are sharp. The third design shows the petals inverted when compared to the first, the rounded side at the bottom and the sharp side at the top, the fourth rangoli pattern - petals are drawn around a point.
Rangoli using motifs shown above with steps
 The rangoli on the left (with blue and brown petals) is another of the many floral designs I have tried in Rangoli-sans-dots The flower at the centre has been surrounded by one more flower. The edges of the petals of the outer flower and in between them some simple patterns have been drawn. Then colourful lines are drawn inside the rangoli to get the image as seen below. In both designs the gaps can be filled with colour rangoli powder. It will be more suited to the design above. The floral pattern below looks nice even without this enhancement. Hence probably it is better to leave it as it is. Two intermediate steps for this simple rangoli in the pictures below for reference though the image in colour is itself self explanatory.
Simple rangoli motifs or patterns
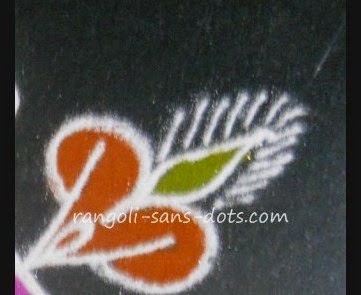
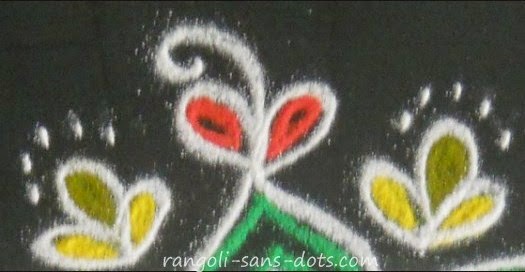
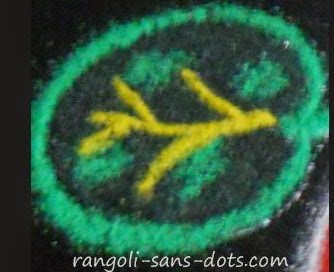
Some simple motifs that are used in rangoli designs, ( free hand designs ) are shown in the image. Of course, there are innumerable patterns that can be used . These patterns or motifs are used in kolam and rangoli designs ( free hand and with dots ). In rangoli with dots these motifs are used to decorate the periphery or to form patterns using the dots. Some motifs that I have used in Rangolisansdots in the images below.
The first two motifs are from the same rangoli. The one one the left with two circulars patterns on either side of a petal or leaf. On the right three circular patterns around a triangle ( obviously ). We can further decorate with white lines as shown.
The next motif is quite common too. Three lobed leaf or flower patterns and two lobed patterns are quite frequently used. To further add beauty we can add white dots as shown or colourful dots or dots with alternate colours.The next motif is from a double line or parallel line or two line design. Parallel lines have their own beauty and are not easy to draw. The motif can be left as it is or we can add a beak , eye and crown to make it represent a bird. On the right is another way of representing a bird in a motif in rangoli. This is usually used in free hand rangoli designs. Draw the heart shaped body of the bird draw a simple pattern to represent the tail and on the top add designs as shown to get the head, beak and the eye. Yet another simple idea for drawing a bird in a rangoli.
The next motif is also quite common with curlicues on the top of a floral pattern with leaf or petal design to enhance the appearance.The next pattern represents a lotus leaf or thamarai elai as we call it and obviously forms part of a lotus rangoli design. The yellow and green colours used for the leaf make it appear more naturalistic. In rangoli or kolam using the two finger technique we try to draw patterns according to our imagination. What we can achieve is restricted to what is possible by drawing these patterns with kolam powder.
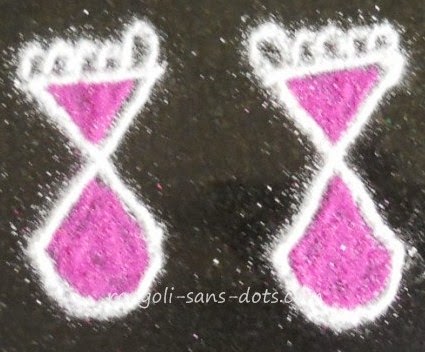
The feet of God or Goddess are used in kolam or rangoli in festivals like Varalakshmi Vratham, Krishna Jayanthi . One of the simplest methods of depicting the feet of the God / Goddess is shown in the image below. There are many more methods that can be used.
Some rangoli for kids - activity through rangoli
My school-going daughter has developed an interest in (my) rangolis. She keeps pestering me to draw simple ones so that she can practise. Some posts are meant for her like this one.When I started this, I never thought that it would interest my daughter. What I did not realise is that children are technology savvy and they are willing to accept and learn when it is given through the medium of their choice. I had been telling her to study this art but in vain so far, when it is through the internet she readily accepts. Are results more important than the means?
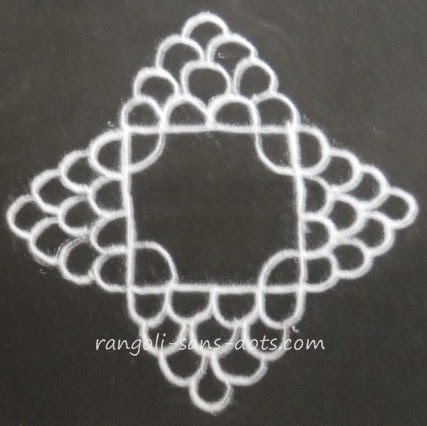
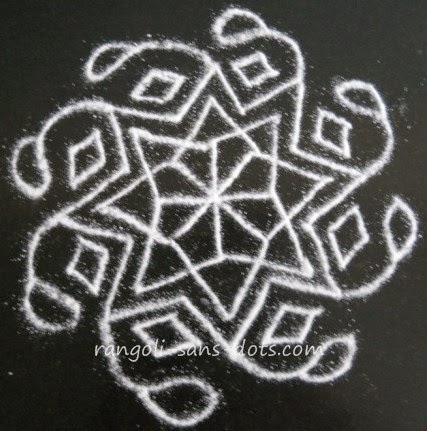
Rangolis for beginners are drawn occasionally in Rangoli-sans-dots. There are three posts so far if my memory serves me right. After all everyone was a beginner before becoming an amateur. Below are some rangoli designs that are either complete or part of rangoli drawn by me. They may be suitable for kids also to learn and practice because they are basic designs. (However please use your discretion). The first rangoli below is a simple design as is evident from the image. A floral design evolved from a basic design of four triangles touching each other at the vertices. Practising this helps drawing petals of different shapes. Though I have drawn with rangoli ( powder ), one may try to practice with sketch pen or chalk piece or pencil any other means one feels comfortable till he/she attains the required degree of dexterity, speed and comfort in drawing.The next rangoli design has a square at the centre and along each side semi-circular patterns of decreasing number are drawn to get the final image.Once the rangoli designs are practised, the design above can be practised because it is somewhat difficult it is star design with petals on the edges. The rangoli design is drawn first and then another set of parallel lines are drawn to get the final image.The rangoli is somewhat difficult,
My school-going daughter has developed an interest in (my) rangolis. She keeps pestering me to draw simple ones so that she can practise. Some posts are meant for her like this one.When I started this, I never thought that it would interest my daughter. What I did not realise is that children are technology savvy and they are willing to accept and learn when it is given through the medium of their choice. I had been telling her to study this art but in vain so far, when it is through the internet she readily accepts. Are results more important than the means?
Rangolis for beginners are drawn occasionally in Rangoli-sans-dots. There are three posts so far if my memory serves me right. After all everyone was a beginner before becoming an amateur. Below are some rangoli designs that are either complete or part of rangoli drawn by me. They may be suitable for kids also to learn and practice because they are basic designs. (However please use your discretion). The first rangoli below is a simple design as is evident from the image. A floral design evolved from a basic design of four triangles touching each other at the vertices. Practising this helps drawing petals of different shapes. Though I have drawn with rangoli ( powder ), one may try to practice with sketch pen or chalk piece or pencil any other means one feels comfortable till he/she attains the required degree of dexterity, speed and comfort in drawing.
The next rangoli design has a square at the centre and along each side semi-circular patterns of decreasing number are drawn to get the final image.Once the rangoli designs are practised, the design above can be practised because it is somewhat difficult it is star design with petals on the edges. The rangoli design is drawn first and then another set of parallel lines are drawn to get the final image.The rangoli is somewhat difficult,
Rangoli making / Rangoli drawing - double stroke
The first image above shows the first stage of the rangoli. I have used only parallel lines drawn simultaneously in this design. Draw four pairs of intersecting lines. From the ends of each line connect the adjacent line to get the pattern seen above. A very basic design that can by itself used as a simple rangoli for our homes. The next design has evolved from the previous one. Draw a parallel line border matching the contours of the first design. Connect the border and the floral design with as many straight lines as possible . The third stage of the rangoli is shown below. Decorate the periphery of the rangoli with floral motifs that are formed using spiral and circular patterns. Also fill the petals at the centre with simple oval designs. This is a plain rangoli by itself and can be drawn at entrances. The rangoli can be filled with colours. Adding colours will make any rangoli very attractive. Actually rangoli means rows of colours. Hence colours and rangoli always go together. This rangoli in colours has been posted in a subsequent post Rangoli above has evolved from the second one which has evolved from the first image above. All three are unique by themselves and can be drawn depending upon the occasion, availability of time and space. Thus from a single basic version, many with intricate patterns can evolve. I have constraints in space at present which will be reflected in many designs. The rangoli after addition of a few colours and the effect of colours on a plain white rangoli is clearly visible. Add lines of different colours between the double line border and the floral design and fill the patterns with colours of your choice to get this simple design of rangoli This is the advantage of freehand rangolis. We can decide to what extent we want to expand a rangoli. In the case of rangoli with dots, the size is limited to the number of dots. However both are appealing and also challenging in their own way. We can also have a combination of both freehand and those with dots to get the advantages in appeal and appearance of both types. Obviously, the rangoli with dots has to be the central design around which the freehand patterns can be drawn Some white rangoli designs for kids activity - colouring, drawing Some of the plain free hand rangoli designs taken from various places in rangoli-sans-dots.com are given here. A colourful version of the rangoli aboveis also available in Rangolisansdots. It has a central floral design expanded according to our imagination. While the central flower can be filled with one colour the outer design can be filled with different colours. This is a plain version of flowers and diya design. The diyas can be filled with brown and orange, brown for the diya and orange or red for the flame. The floral design can be filled with pink or red or any other colour. Other remaining patterns can be filled with matching colours. The next two designs are taken from Margazhi season and rangoli. They are intermediate stages of a completed design. I thought they are suitable to be posted here and so here they are. One is drawn with parallel lines so either the inside of the patterns can be filled with colours or the gaps between the parallel lines can be filled with colours as I have done in some designs. The second one below is a beautiful and cute ( I think ) rangoli design, with a square centre surrounded by honey-comb like ( though they are not hexagonal ) shapes and floral designs. Again colours depend upon our imagination. The next rangoli design is also a simple floral petal design with a central petal surrounded by more flowers. An apt design for filling with colours. All of them are free hand patterns drawn spontaneously except the third and fourth - they are common designs and can also been drawn with dots. Since this website is about rangoli without dots, primarily, posting of such designs is to show the wide variety of designs that are available to us . |
More rangoli patterns to colour Rangoli designs for colouring activity
More white kolam designs for activity or just for kolam Few more white kolam designs posted with colours in various places in Rangolisansdots. The next design is taken at a suitable angle so that we get a view of the rangoli as viewed at eye level ( almost ). A close up of the rangoli will show the rangoli powder spilling on either side of the lines, patterns and designs. This gives a very naturalistic appearance to the rangoli deisgn. The lesser the grains of rangoli powder that spill the more proficient we become in drawing rangoli. There is nothing to beat the beauty of a rangoli drawn with the traditional method of drawing with rangoli ( kolam maavu as it is called in Tamil ) |
1. What is a free hand rangoli
A rangoli design drawn without a dot grid also called rangoli without dots
2. How does rangoli with dots differ from those without dots
Rangoli with dots - the design is restricted to the dot pattern whereas free hand rangoli can be expanded and expanded so long there is space and time.
Both are easy and difficult in their own ways. Some are comfortable with free hand designs and some with dot patterns. Both need practice, creativity, patience and imagination.
3. Is it possible to draw the same pattern with dots and without dots
It is easy for small designs and becomes more and more difficult as the design becomes bigger and more intricate. So while a basic design may be drawn free hand and with dots some elements of ( free hand rangoli drawn with dots) may have to be drawn free hand
4. Should we draw free hand rangoli or with dot patterns
Free hand rangoli designs are more suitable for curved patterns of different types , floral designs, petal designs and birds and so on. Rangoli with dots are usually more suitable for geometric patterns like triangles, squares, rectangles and rhombuses. Of these triangles and rhombuses, parallelograms are used quite a lot.
The bigger the dot pattern the more complicated the design becomes. So one needs practice to draw bigger designs without making mistakes because one mistake and the whole design can go wrong and we may have to redo part or a big part of the rangoli design. However, all smaller designs can be drawn free hand and with dots with some degree of similarity.
What is the difference between rangoli and kolam
Rangoli is an Indian art drawn on the floor rang means colours. Kolam is the same art called so in Tamil Nadu. Kolam means beauty
How to draw a rangoli on tiles ?
I presume that it is ceramic tiles. I don't see any problem in drawing a rangoli on a tiled surface. The only thing to be borne in mind is the colour of the tiles and colour of the rangoli (powder ) should be different. The darker the shade of the tiled surface the lighter the colour of rangoli ( powder) the better the presentation.The flow of rangoli should not be a problem.
The answer is quite simple. It depends upon what festival or occasion we are going to celebrate. For Independence Day or Republic Day it can be combination of orange green white and blue colours ( for India) and similarly for other countries. For festivals like Diwali and Karthigai ( in Tamil Nadu ) it can be combination of lamps with any other pattern drawn free hand or with dots.
How to choose the colour combination in a rangoli?
After drawing the rangoli with plain rangoli , before filling up with colours we can try the colours in an area near the rangoli to check whether the colour combination we want to use is alright and is to our satisfaction. After we are satisfied we can fill up the rangoli with the chosen colours.. How to choose a theme for a rangoli
The answer is quite simple. It depends upon what festival or occasion we are going to celebrate. For Independence Day or Republic Day it can be combination of orange green white and blue colours ( for India) and similarly for other countries. For festivals like Diwali and Karthigai ( in Tamil Nadu ) it can be combination of lamps with any other pattern drawn free hand or with dots.
What are the other uses of a rangoli
Apart from the traditional use of rangoli as a floor art for welcoming guests and for that matter anyone who visits our house rangoli can also be used on greeting cards.
Rangoli - greeting card ideas
Though there are many ways to design a greeting card, rangoli designs are one of the most important and beautiful options. Greeting cards are sent for festivals like Diwali, Pongal or Sankranthi , NewYear and many other festivals. Presently, greeting cards are e-cards, still rangoli is an excellent option for designing a card.
Rangolis differ from paintings in that intricate details of the subject being drawn are not shown or are not given importance. Importance is on imagination, symmetry, and the use of motifs to suit our taste. Rangoli is drawn the floor, where there is a constraint in space and there is constraint in time also , hence these are to be factored into when drawing or appreciating a rangoli. More importantly, these are art forms that last for a very short time and are drawn every day at the entrance and for them to last for a long time they can be drawn on a festival greeting card.
Since inspiration for rangoli is drawn from nature it is natural to draw fruits, birds, animals, flowers,leaves, creepers, geometric shapes and patterns according to one's imagination. These are the variables that can be combined to our convenience and imagination the constraints being credibility in the design. Usually, we add colours to suit the fruits, birds etc.drawn. However we can take some liberty in changing the colours, hoping that it will be acceptable !
The image below shows a greeting card for New Year "designed" with rangoli patterns and borders. On the right I have drawn a simple free hand rangoli design using patterns that are quite common in Rangoli-sans-dots. The greeting card has been decorated with borders. The space around the rangoli and " Happy New Year " again can be decorated with some ore simple patterns. For free hand rangoli designs for card ideas for festivals like Navratri, Diwali New Year and Sankranti simple rangoli designs in Rangolisansdots can be made use of.
The image below shows a greeting card for New Year "designed" with rangoli patterns and borders. On the right I have drawn a simple free hand rangoli design using patterns that are quite common in Rangoli-sans-dots. The greeting card has been decorated with borders. The space around the rangoli and " Happy New Year " again can be decorated with some ore simple patterns. For free hand rangoli designs for card ideas for festivals like Navratri, Diwali New Year and Sankranti simple rangoli designs in Rangolisansdots can be made use of.
Make rangoli in 2,3,4 steps !
For craft ideas
There is a collection of 30 + + videos on rangoli or kolam designs with dots in my video channel. The watch time is around 60 minutes. The link is at 30 simple rangoli designs


